
With so many polymer clay products to explore, you may notice one type that appears quite different because, unlike the rest, it comes in a bottle — liquid polymer clay. You can create tons of fun things with this fluid clay medium! The possibilities are endless with this unique claying resource, from earrings to window clings.
We’ve collected our top tips on using liquid clay for beginners so you can start crafting with confidence, even with no claying experience. Let’s dive into the world of liquid polymer clay!
Difference Between Liquid Clay and Regular Polymer Clay
Regular polymer clay is a pliable, oven-hardening modeling clay that crafters shape, squish and sculpt into one-of-a-kind crafts, like vases and figures. Liquid clay is exactly what its name describes — polymer clay in a liquid state.
In its unbaked form, liquid clay behaves very differently from regular clay. Liquid polymer clay can do things traditional clay cannot — you can squeeze liquid clay straight from the bottle to freehand designs or pour it into molds to cast unique shapes. Both regular and liquid polymer clays bake in the oven to cure.
Can I Use Regular Polymer Clay and Liquid Clay in the Same Project?
Yes, you can use liquid clay to add details to baked regular clay creations, as long as you bake the project in stages:
- Shape your project using regular clay.
- Bake the form according to package instructions.
- While the regular clay is still warm, carefully add your liquid clay details.
- Bake again following Liquid Sculpey® package instructions to cure the project.
5 Beginner Tips for Liquid Polymer Clay
For clayers who have worked with regular polymer clay before but not our liquid clay, and for crafters who are new to polymer clay altogether, Sculpey® liquid clay is the perfect material to expand your skills or learn a new hobby. Follow these helpful liquid polymer clay beginner tips to begin your crafting journey!
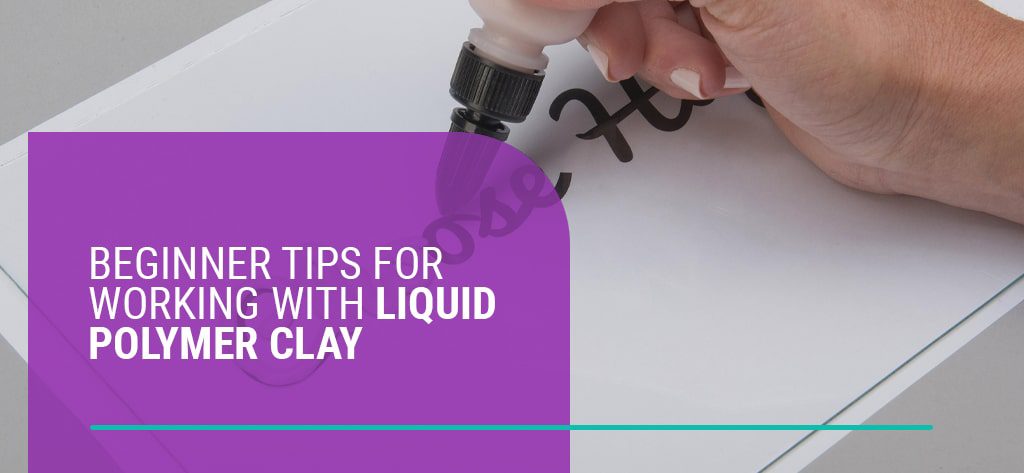
1. Draw Designs Straight From the Bottle
All Sculpey® liquid polymer clays come in an easy-to-use bottle with adjustable caps for precise flow control, so you can make details as thin or thick as you want. Before you start drawing, remove the cap and gently stir with a plastic or metal stick to thoroughly mix the formula. Always stir — shaking the bottle can add unwanted air bubbles.
To use your Liquid Sculpey®, twist open the cap and gently squeeze while moving your hand in a smooth, even motion, and try these ways to create:
- Draw fine lines: Open the cap a little for thin lines, words and intricate patterns.
- Trace patterns: Place an image under oven-proof glass, then trace the liquid clay outline on top.
- Add thicker details: Open the cap halfway for wider lines, large dots and other details.
- Drizzle designs: Swirl Liquid Sculpey® onto baked polymer clay that’s still warm from the oven.
- Flood sections: Fill in baked liquid clay outlines for window cling and stained glass projects.
2. Utilize Liquid Polymer Clay Tools
Regular polymer clay crafters use clay-shaping tools to form their creations. While liquid clay is a very different medium, there are specific tools for simplifying your liquid clay crafting process. Take your projects from great to amazing with these beginner-friendly liquid clay tools:
- Mixing cups: Our non-stick Sculpey® Silicone Mixing Set includes an oven-safe cup, as well as a stir stick and lid for liquid clay mixing, pouring and storage. Bake leftover liquid clay in the cup for quick cleanup — it will peel away from the silicone easily!
- Oven-safe mat: Go from creating to baking with the silicone Sculpey Tools™ Oven-Safe Work Mat, which doubles as work surface protection.
- Glass panel: Use a piece of oven-safe glass over an image to trace liquid clay outlines.
- Heat gun: If you notice a cloudy appearance after baking Liquid Sculpey® Clear, hit it with a heat gun to develop a crystal clear, glossy finish.
- Needle tool: Use a toothpick or Needle End Pointer from the Sculpey Tools™ Clay Tool Starter Set to pop air bubbles that rise to the surface.
- Squeegee: Push liquid clay into shallow, intricate-design silicone molds and remove excess clay before baking with a squeegee.
3. Make Jewelry and More With Molds
With beginner-friendly Sculpey Tools™ Oven-Safe Molds, new clayers can cast intricate shapes and designs even with no claying experience. Pour liquid clay into our collection of silicone molds and bake to create magnets, jewelry and more in a wide variety of styles:
- Fantasy crafts: Our Whimsy and Boho Chic molds make fairy wings, mermaid tails, feathers, hearts and stars for magical projects.
- Nature creations: Cast flowers, leaves, shells and ocean creatures for botanical and nautical crafts with our Flowers and Sea Life molds.
- Jewelry pieces: Making earrings, pendants and charms is a breeze with Sculpey® 3D Jewelry, Cabochon and Bezel molds. Our time-saving Jewelry mold has a post included in each shape, so there’s no need to drill holes after creation!
- Delicate details: Make fine lace, butterflies and intricate shapes for anything from paper crafts to cosplay using our Lace, Butterflies and Mandala molds. Fill the cavities with Liquid Sculpey®, use the included squeegee to remove excess clay and bake!
4. Mix in Mica Powder and Other Additives
One of the most exciting qualities of clear and translucent liquid clays is that you can incorporate fun glitters, confetti and more to create a custom pour! Stirring in additives is a simple way for beginner crafters to elevate jewelry pieces and home decor projects.
We recommend pouring liquid clay into a Sculpey® Silicone Mixing Set cup and stirring in additives for more control, then pouring the mixture into your molds. Imagine all the magical creations you can bring to life with these mix-ins:
- Glitter: Add sparkle with metallic glitter in varying colors and sizes. Try iridescent glitter flakes to mimic ice, fantasy props, opals and gems.
- Mica powder: Mix in fine mica powders to add shimmery color and create faux effects like turquoise, pearl, metallic, agate and marble finishes.
- Alcohol inks: Tint liquid clay with a drop or two of alcohol ink — create see-through blue water effects in dioramas and cast colorful gems!
- Scatter confetti: Try shapes like stars, moons and leaves. Make accessories for Halloween, holidays and parties with seasonal confetti mixes.
- Mixed media: Preserve small items like spices, dried flowers, pressed leaves and tiny shells in liquid clay cabochons, pendants and coasters.
5. Set Yourself Up for Clay-Baking Success
Prevent some of the most common beginner mistakes by ensuring your creating and baking processes are done right. A little preparation goes a long way. Follow these tips for a successful finished product:
- Use the right kind of oven: Only use a conventional home oven or toaster oven for baking your clay, never a microwave.
- Check temperature accuracy: Always use an oven thermometer to ensure your oven is set to the correct temperature.
- Remove air bubbles: Pick up and gently drop the mold on your work surface a few times to help bubbles rise to the top. Pop surface bubbles with a needle tool before baking.
- Prevent ripples: Turn off your oven’s convection feature to prevent the fan from creating a wavy texture in the liquid clay as it bakes.
- Follow package instructions: Bake Liquid Sculpey® at 275°F (135°C) for 15 to 30 minutes. For Liquid Sculpey® Clear, bake at 300°F (149°C).
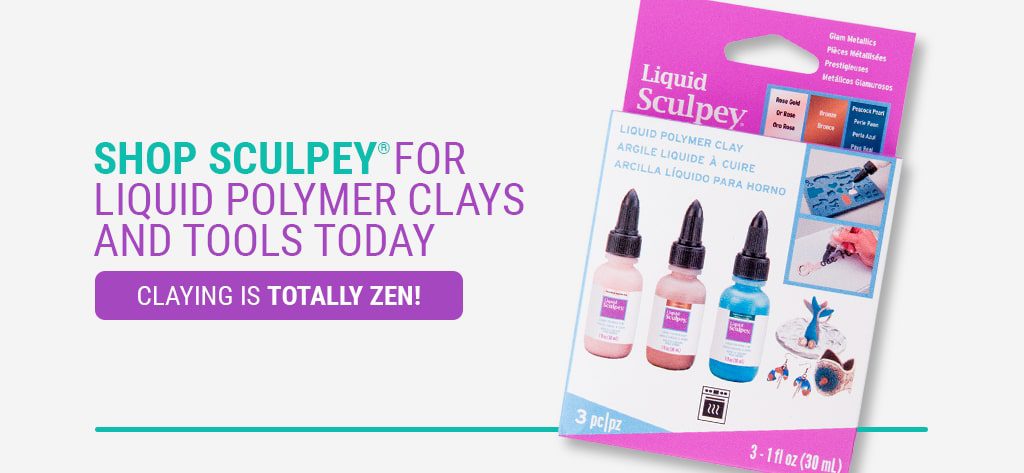
Shop Sculpey® for Liquid Polymer Clays and Tools Today
From beginners to seasoned clayers, Sculpey® has everything you need to make professional-looking liquid clay projects from start to finish. Browse our Liquid Sculpey® colors in matte, metallic, translucent and clear finishes:
- Black and white
- Primary colors
- Glam metallics
- Gold and silver
- Glow in the dark
- Pearl finishes
- Translucents
- Crystal clear
- Multi-packs
The creative ideas you can accomplish with Sculpey® products are endless! Get inspired with our How-To page to learn step-by-step how to create countless Liquid Sculpey® projects.
For product questions, contact us online.
