
If you’ve ever wondered whether you can transfer printed designs to your polymer clay projects, the great news is — you absolutely can! We’ll show you how to use two different methods to turn your printed photos, patterns, designs and illustrations into durable clay decorations.
Learn how to embellish a clay craft, start to finish, in one afternoon by turning your home printer into an incredible image transfer tool!
What Is a Polymer Clay Transfer?
Polymer clay transfer is the technique of taking a printed image and fusing it to the surface of polymer clay — the transmission of a picture from paper to clay. Crafters love using this method to decorate jewelry and other decorative items with endless design possibilities. A polymer clay transfer can add detailed image transfers of flowers, cartoon characters, vintage illustrations, geometric patterns or photographs to your next project.
Determine the following details before you begin your project:
- Picture orientation: A laser-printed image must be mirrored before transferring it to the clay. Use picture formatting options to reverse your image or flip it horizontally before printing.
- Paper type: The transfer process varies depending on whether the image is printed on regular copier paper or photo paper.
- Image color: You can print black-and-white or color images, or manually add color with markers, pencils and inks.
- Printer type: Choose whether an inkjet or laser printer will create the image, as the printer decides the transfer method.
Types of Polymer Clay Transfers
There are two types of clay image transfers based on the printer used to make the image — laser and inkjet. Because these printers create images in different ways, they require very different steps to transfer the image onto polymer clay successfully.
Laser printers are toner-based machines that use heat and plastic powders to generate an image on paper. The “ink” used in a laser printer is actually plastic! The printed plastic softens and sticks when it comes into contact with the raw polymer clay plasticizers. The paper is then wetted and removed, leaving the image adhered to the clay surface.
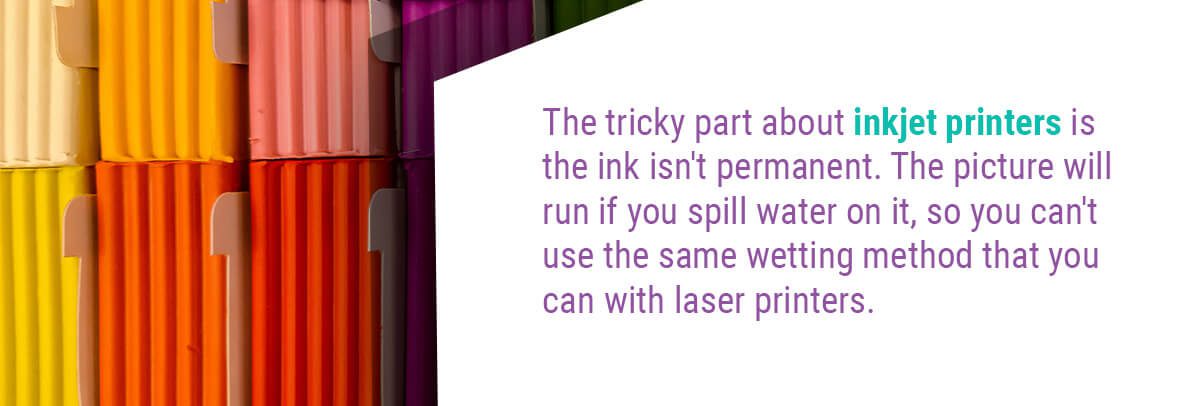
Alternatively, inkjet printers spray water-soluble ink — not plastic — onto paper to produce an image. The tricky part about inkjet printers is the ink isn’t permanent. The picture will run if you spill water on it, so you can’t use the same wetting method that you can with laser printers. To make a clay-compatible inkjet image transfer, you must use a specialty paper to bind and hold the ink:
- T-shirt transfer paper: The special coating of T-shirt paper absorbs ink so it can transfer to clay.
- Water-slide decal paper: This works like children’s tattoos to adhere inked paper onto the clay.
- Photo printer paper: Results vary based on the paper brand. Use our tutorial to make a transfer using Clear Liquid Sculpey® over photo paper.
How to Make a Polymer Clay Image Transfer
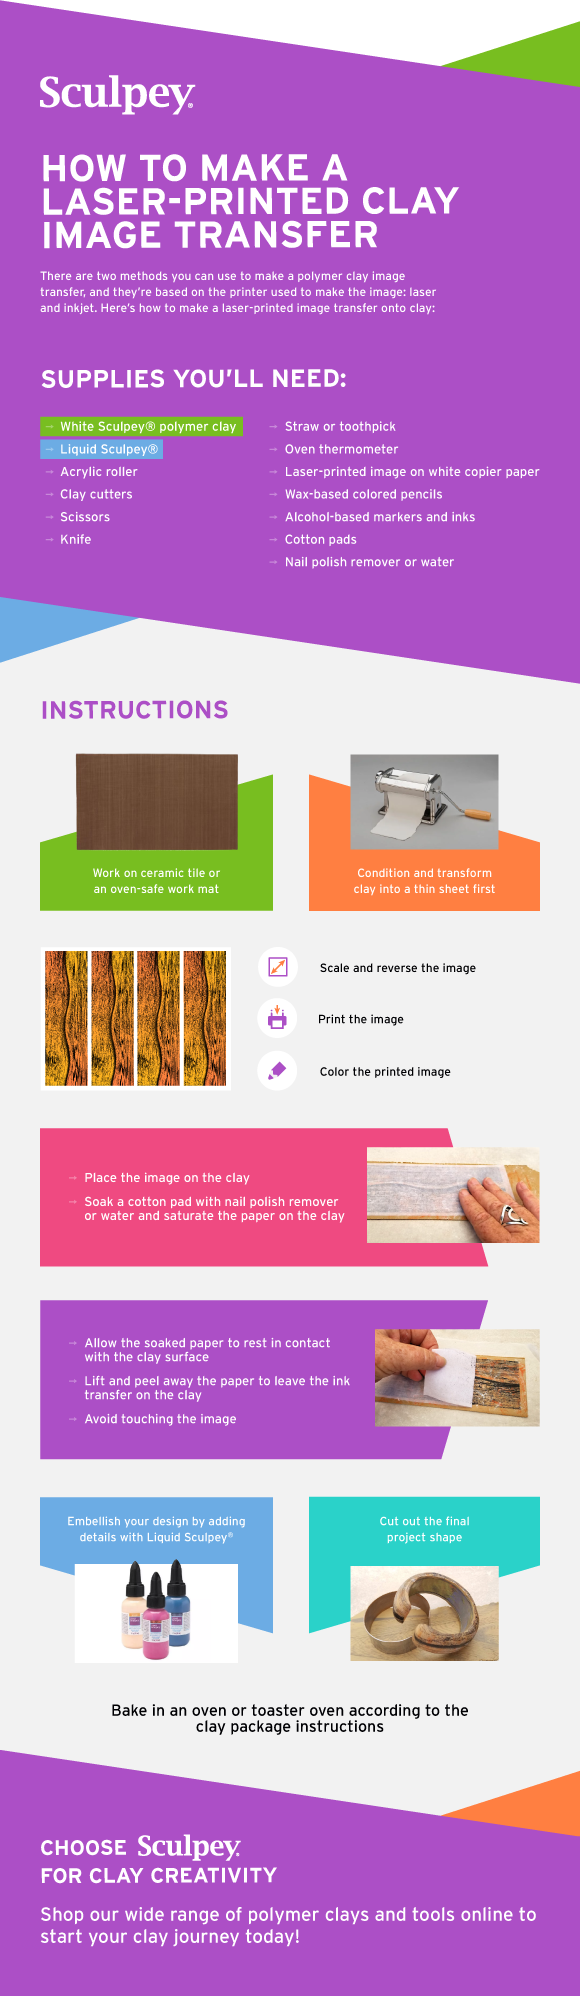
No matter which method you use to make the image transfer, first you’ll need to prepare the clay and work surface:
- Make a sheet of clay: Condition and transform white polymer clay into a thin, even sheet using our Sculpey Tools™ Clay Conditioning Machine.
- Protect your work surface: Work on a ceramic tile or our Sculpey Tools™ Oven-Safe Work Mat to transport the clay from table to oven with ease!
Collect your primary transfer supplies:
- White polymer clay
- Liquid polymer clay
- Acrylic roller
- Clay cutters
- Scissors
- Knife
- Straw or toothpick
- Oven thermometer
- Oven or toaster oven
How to Transfer a Laser-Printed Image Onto Clay
Add these laser-specific supplies to the rest of the transfer materials:
- Laser-printed image on white copier paper
- Wax-based colored pencils
- Alcohol-based markers and inks
- Cotton pads
- Nail polish remover or water
Transfer a laser-printed image onto clay in eight easy steps:
- Print your image: Remember to scale and reverse the image before printing! Print the picture on standard white copier paper using a toner-based laser printer.
- Color the printed image: If desired, add color to the printed image before transfer. Use artists’ quality wax-based colored pencils and alcohol-based markers.
- Place the image on the clay: Cut out the picture and place it image side down onto the raw clay sheet. Gently roll over the paper with our Sculpey Tools™ 8-Inch Acrylic Clay Roller.
- Saturate the paper: Soak a cotton pad with nail polish remover or water and saturate the paper on the clay. Nail polish remover tends to work faster and deliver a sharper transfer. Apply gentle pressure and avoid any shifting. Roll the paper again with the acrylic roller to ensure a flat clay surface.
- Give it time to transfer: Allow the soaked paper to rest in contact with the clay surface for several minutes to an hour, but do not allow the paper to dry. Now comes the fun part — slowly lift and peel away the paper to leave the ink transfer on the clay!
- Avoid touching: The clay plasticizers will react with the printed plastic image, causing stickiness. Take care not to touch the image until the project is baked.
- Embellish your design: If the transfer appears muted, go back with alcohol inks and markers to boost the color saturation directly on the clay. You can also add details with mica powders and Liquid Sculpey®.
- Trim and bake: Cut out the final project shape with a knife or Sculpey Tools™ Cutters. Remember to punch a hole at the top of earrings, keychains and pendants for fasteners using a straw or toothpick. Bake in an oven or toaster oven according to the clay package instructions.
How to Transfer an Inkjet-Printed Image Onto Clay
Add these inkjet-specific supplies to your basic transfer materials:
- Inkjet-printed image on matte finish photo paper
- Clear Liquid Sculpey®
- Palette knife
- Heat gun
Here’s how to transfer an inkjet-printed image onto polymer clay:
- Print your picture: Unlike a laser print, you won’t have to reverse the image. Print it precisely as you’d like it to appear, in black and white or color. When using an inkjet printer, print on clay-compatible T-shirt transfer, water-slide, decal or photo printer paper. This tutorial explains how to transfer a matte photo paper image.
- Apply liquid polymer clay: Spread a thin layer of Clear Liquid Sculpey® over the surface of the printed image, ink side up, with a palette knife or your finger. Spread the coating beyond the image edge.
- Add heat to set the clay: Warm up the Liquid Sculpey® coating with a heat gun, moving in a circular motion to prevent burning. A matte skin will start to appear. As you continue heating, the surface will shift from milky to transparent. When you can clearly see the image through a glass-like coating, it’s cured.
- Cut out the image: Trim away the excess paper from the cured transfer edges, leaving only the image.
- Paper-removed transfer option: Soak the coated image in a bowl of soapy water for at least one minute. Peel the paper off the back of the transfer. Scrub off remaining paper fibers with an old, soft toothbrush. The transfer will look like a thick piece of film. Place the paperless transfer onto the clay sheet and roll with an acrylic roller, taking care not to trap any air bubbles.
- Paper-remains transfer option: Alternatively, you can choose not to soak or remove the paper backing and instead embed the coated transfer, paper and all, onto your clay. For a paper-stays-on approach, cover the back of the paper with Clear Liquid Sculpey® and stick it to the clay sheet. Roll over the image with an acrylic roller to adhere it to the clay surface.
- Trim and bake: Cut out the final project shape, leaving about 1/8-inch perimeter of clay around the image. Add holes for fasteners if necessary and bake according to the instructions on the clay package.

Choose Sculpey® for Clay Creativity
Discover how to make one-of-a-kind polymer clay transfers, jewelry, home decor and crafts with our innovative products! For more than 50 years, Sculpey® has helped crafters take their imagination to reality. Shop our wide range of polymer clays and tools online to start your clay journey today!
For clay questions, visit our FAQs section or contact us online.
If you’ve ever wondered whether you can transfer printed designs to your polymer clay projects, the great news is — you absolutely can! We’ll show you how to use two different methods to turn your printed photos, patterns, designs and illustrations into durable clay decorations.
Learn how to embellish a clay craft, start to finish, in one afternoon by turning your home printer into an incredible image transfer tool!
What Is a Polymer Clay Transfer?
Polymer clay transfer is the technique of taking a printed image and fusing it to the surface of polymer clay — the transmission of a picture from paper to clay. Crafters love using this method to decorate jewelry and other decorative items with endless design possibilities. A polymer clay transfer can add detailed image transfers of flowers, cartoon characters, vintage illustrations, geometric patterns or photographs to your next project.
Determine the following details before you begin your project:
- Picture orientation: A laser-printed image must be mirrored before transferring it to the clay. Use picture formatting options to reverse your image or flip it horizontally before printing.
- Paper type: The transfer process varies depending on whether the image is printed on regular copier paper or photo paper.
- Image color: You can print black-and-white or color images, or manually add color with markers, pencils and inks.
- Printer type: Choose whether an inkjet or laser printer will create the image, as the printer decides the transfer method.
Types of Polymer Clay Transfers
There are two types of clay image transfers based on the printer used to make the image — laser and inkjet. Because these printers create images in different ways, they require very different steps to transfer the image onto polymer clay successfully.
Laser printers are toner-based machines that use heat and plastic powders to generate an image on paper. The “ink” used in a laser printer is actually plastic! The printed plastic softens and sticks when it comes into contact with the raw polymer clay plasticizers. The paper is then wetted and removed, leaving the image adhered to the clay surface.
Alternatively, inkjet printers spray water-soluble ink — not plastic — onto paper to produce an image. The tricky part about inkjet printers is the ink isn’t permanent. The picture will run if you spill water on it, so you can’t use the same wetting method that you can with laser printers. To make a clay-compatible inkjet image transfer, you must use a specialty paper to bind and hold the ink:
- T-shirt transfer paper: The special coating of T-shirt paper absorbs ink so it can transfer to clay.
- Water-slide decal paper: This works like children’s tattoos to adhere inked paper onto the clay.
- Photo printer paper: Results vary based on the paper brand. Use our tutorial to make a transfer using Clear Liquid Sculpey® over photo paper.
How to Make a Polymer Clay Image Transfer

No matter which method you use to make the image transfer, first you’ll need to prepare the clay and work surface:
- Make a sheet of clay: Condition and transform white polymer clay into a thin, even sheet using our Sculpey Tools™ Clay Conditioning Machine.
- Protect your work surface: Work on a ceramic tile or our Sculpey Tools™ Oven-Safe Work Mat to transport the clay from table to oven with ease!
Collect your primary transfer supplies:
- White polymer clay
- Liquid polymer clay
- Acrylic roller
- Clay cutters
- Scissors
- Knife
- Straw or toothpick
- Oven thermometer
- Oven or toaster oven
How to Transfer a Laser-Printed Image Onto Clay
Add these laser-specific supplies to the rest of the transfer materials:
- Laser-printed image on white copier paper
- Wax-based colored pencils
- Alcohol-based markers and inks
- Cotton pads
- Nail polish remover or water
Transfer a laser-printed image onto clay in eight easy steps:
- Print your image: Remember to scale and reverse the image before printing! Print the picture on standard white copier paper using a toner-based laser printer.
- Color the printed image: If desired, add color to the printed image before transfer. Use artists’ quality wax-based colored pencils and alcohol-based markers.
- Place the image on the clay: Cut out the picture and place it image side down onto the raw clay sheet. Gently roll over the paper with our Sculpey Tools™ 8-Inch Acrylic Clay Roller.
- Saturate the paper: Soak a cotton pad with nail polish remover or water and saturate the paper on the clay. Nail polish remover tends to work faster and deliver a sharper transfer. Apply gentle pressure and avoid any shifting. Roll the paper again with the acrylic roller to ensure a flat clay surface.
- Give it time to transfer: Allow the soaked paper to rest in contact with the clay surface for several minutes to an hour, but do not allow the paper to dry. Now comes the fun part — slowly lift and peel away the paper to leave the ink transfer on the clay!
- Avoid touching: The clay plasticizers will react with the printed plastic image, causing stickiness. Take care not to touch the image until the project is baked.
- Embellish your design: If the transfer appears muted, go back with alcohol inks and markers to boost the color saturation directly on the clay. You can also add details with mica powders and Liquid Sculpey®.
- Trim and bake: Cut out the final project shape with a knife or Sculpey Tools™ Cutters. Remember to punch a hole at the top of earrings, keychains and pendants for fasteners using a straw or toothpick. Bake in an oven or toaster oven according to the clay package instructions.
How to Transfer an Inkjet-Printed Image Onto Clay
Add these inkjet-specific supplies to your basic transfer materials:
- Inkjet-printed image on matte finish photo paper
- Clear Liquid Sculpey®
- Palette knife
- Heat gun
Here’s how to transfer an inkjet-printed image onto polymer clay:
- Print your picture: Unlike a laser print, you won’t have to reverse the image. Print it precisely as you’d like it to appear, in black and white or color. When using an inkjet printer, print on clay-compatible T-shirt transfer, water-slide, decal or photo printer paper. This tutorial explains how to transfer a matte photo paper image.
- Apply liquid polymer clay: Spread a thin layer of Clear Liquid Sculpey® over the surface of the printed image, ink side up, with a palette knife or your finger. Spread the coating beyond the image edge.
- Add heat to set the clay: Warm up the Liquid Sculpey® coating with a heat gun, moving in a circular motion to prevent burning. A matte skin will start to appear. As you continue heating, the surface will shift from milky to transparent. When you can clearly see the image through a glass-like coating, it’s cured.
- Cut out the image: Trim away the excess paper from the cured transfer edges, leaving only the image.
- Paper-removed transfer option: Soak the coated image in a bowl of soapy water for at least one minute. Peel the paper off the back of the transfer. Scrub off remaining paper fibers with an old, soft toothbrush. The transfer will look like a thick piece of film. Place the paperless transfer onto the clay sheet and roll with an acrylic roller, taking care not to trap any air bubbles.
- Paper-remains transfer option: Alternatively, you can choose not to soak or remove the paper backing and instead embed the coated transfer, paper and all, onto your clay. For a paper-stays-on approach, cover the back of the paper with Clear Liquid Sculpey® and stick it to the clay sheet. Roll over the image with an acrylic roller to adhere it to the clay surface.
- Trim and bake: Cut out the final project shape, leaving about 1/8-inch perimeter of clay around the image. Add holes for fasteners if necessary and bake according to the instructions on the clay package.
Choose Sculpey® for Clay Creativity
Discover how to make one-of-a-kind polymer clay transfers, jewelry, home decor and crafts with our innovative products! For more than 50 years, Sculpey® has helped crafters take their imagination to reality. Shop our wide range of polymer clays and tools online to start your clay journey today!
For clay questions, visit our FAQs section or contact us online.
