
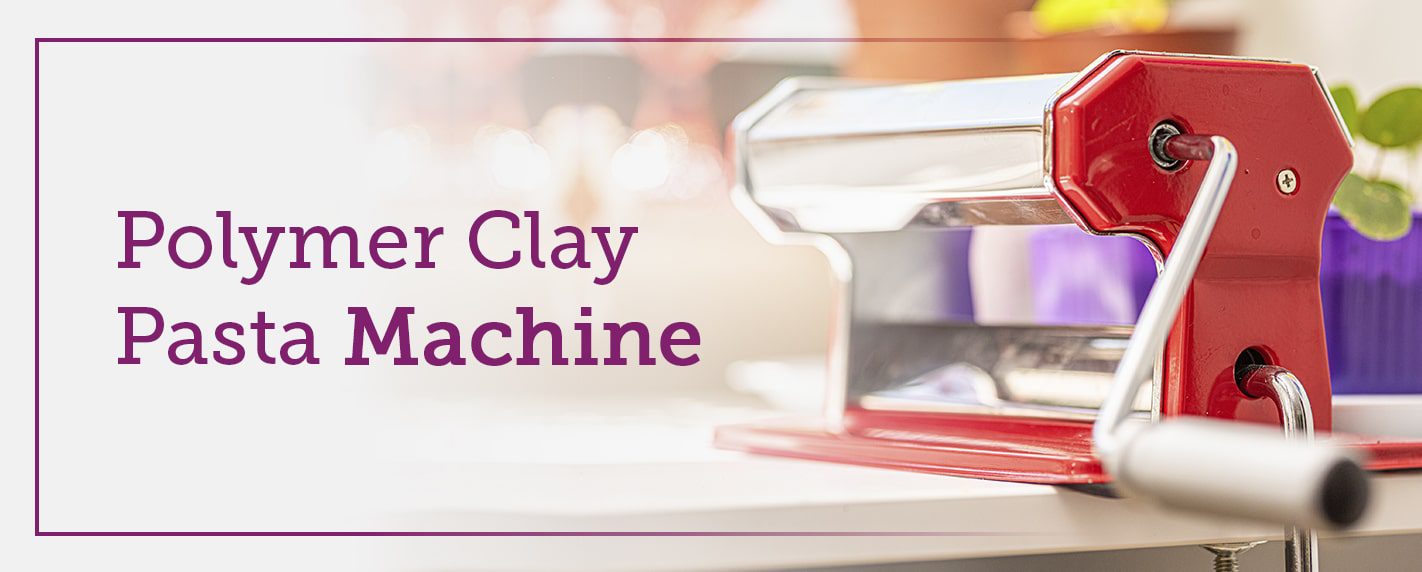
Whether you’re new to the world of polymer clay or have worked with this fun and addictive medium for years, there will come a time when you’ll think about using a clay pasta machine. If you’re ready to take claying to the next level with a pasta machine, you probably have some questions about how it works and what to expect. In this post, we’ll share the basics, from how to use a pasta machine for polymer clay to machine cleaning tips. As you’ll soon discover, using a conditioning tool like a pasta machine is a great way to prepare polymer clay for your next masterpiece.
What Is a Clay Pasta Machine?
Most clay pasta machines are the same tool you would use to make homemade pasta. Clayers discovered they could use pasta machines to quickly and easily condition polymer clay instead of using rolling pins, acrylic rollers or their hands. So, instead of feeding dough through a machine to form pasta sheets, you can roll clay through the machine to condition and flatten the clay.
Conditioning polymer clay should be the first step in any clay project, even if the clay is already soft. Conditioning the clay takes it from block form and transforms it into a smooth and flexible medium by removing air and mixing ingredients evenly. As a result, you’ll have clay that’s pliable and easy to work with. Even though you can condition polymer clay by kneading and stretching the clay, a pasta machine makes the process faster and easier on the hands. Make sure to reserve the pasta machine for clay projects only, and use a separate machine if you crave homemade fettuccine!
What Are the Benefits of Using a Pasta Machine for Clay?

For many clayers, pasta machines are a must-have tool. A pasta machine can really come in handy for a wide range of projects, from creating simple figurines to intricate jewelry pieces. There are several benefits to conditioning clay using a pasta machine, as it:
- -Smooths out clay: A clay pasta machine creates a smooth, flat surface — perfect for use with tools such as cutters or stamps. With a sheet of polymer clay that’s free of bumps and marks, you’ll be ready to bring your creative vision to life.
- -Creates thin layers: Depending on your project, you may need to create very thin layers of polymer clay. For example, a clay pasta machine could help you form thin layers to make a custom notebook cover or layered earrings. Another plus is you can make uniform layers by using the same setting for each segment.
- -Helps create rainbow effects: You can use a clay pasta machine to produce a beautiful sheet of graduated rainbow colors, otherwise known as Skinner blend. To create a Skinner blend, you’ll pass a sheet of various colors through the machine which will blend colors together at the edges. You can use the colorful sheet to make stunning creations like a Premo! Sculpey® Rainbow Skinner Blend Bracelet.
- -Is perfect for the mokume gane technique: Mokume gane is a traditional Japanese technique which involves mixing and manipulating various metal layers to create interesting patterns that resemble wood patterns. Polymer clay is a popular medium for using the mokume gane technique and making gorgeous jewelry or home decor. By using a pasta machine, you can quickly roll out several sheets of clay to stack layers and apply the mokume gane technique to create anything you want.
How Do You Use a Pasta Machine for Polymer Clay?
Before you learn how to use a pasta machine for polymer clay, it helps to know how the components work. A pasta machine is a rather simple device. A typical machine generally features two rollers, a handle on the side for rotating the rollers, a dial for adjusting the space between the rollers and a blade underneath to keep a sheet of clay from wrapping around the roller as it feeds out of the machine.
To use the pasta machine for conditioning clay, you’ll feed polymer clay into the top of the machine and turn the handle to push the clay through the rollers. You can adjust the thickness or thinness of a clay sheet by turning the dial on the side. After you turn the handle, a smooth, flat layer of clay will emerge from the bottom of the machine. Pretty easy, right? Here are step-by-step instructions to make it even easier:
- -First, cut a block of clay into thin slices that are about 1/4-inch thick per slice.
- -Using the thicket or widest setting on the machine, pass each slice of clay through the machine.
- -You should feel some pressure against the clay as it passes through the machine — if you don’t, turn the dial one notch toward the thinner setting.
- -After sending each slice through, feed them into the machine two at a time, then three at a time until you pass all the slices together at once.
- -Make sure to fold the clay in half after each pass and feed it through the machine fold-first.
- -Repeat as needed until the clay is soft and flexible.
If you’re not sure if your clay is fully conditioned or not, keep in mind that it’s usually better to over-condition clay than under-condition it. Therefore, it’s okay to keep rolling if you think the clay could be more soft and flexible.
How Do You Clean a Pasta Machine After Using It With Polymer Clay?
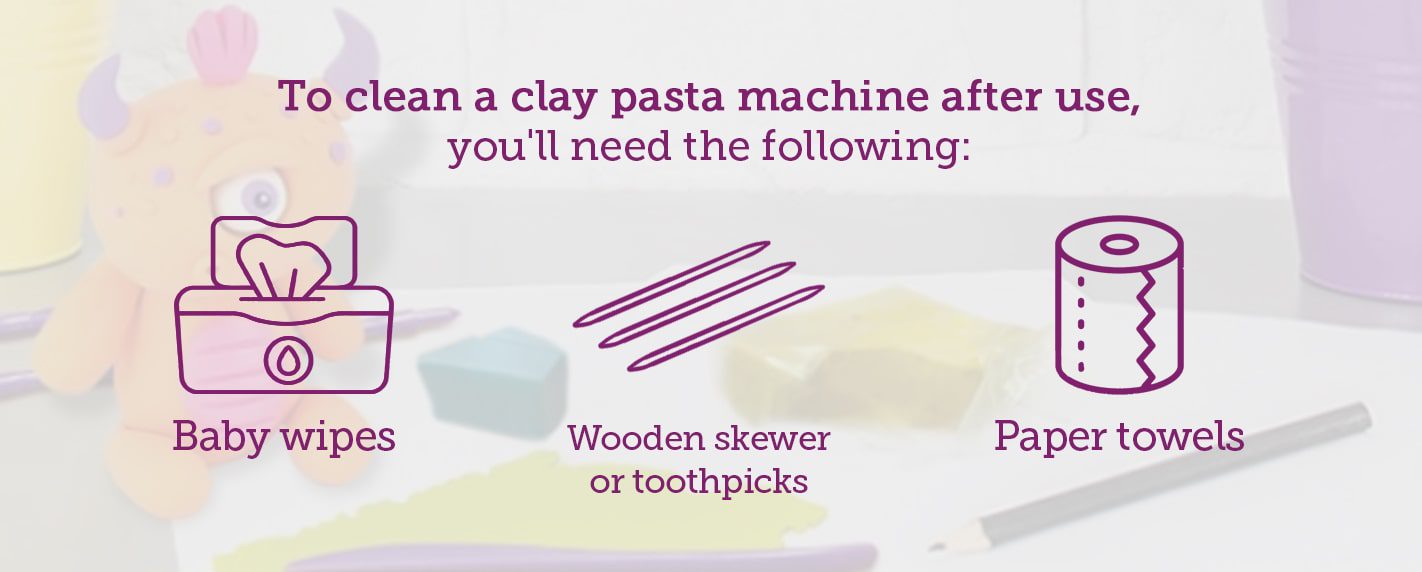
A clean machine is the way to happy claying, so you’ll always want to clean a clay pasta machine either after or before a project. In most cases, there’s no need to take the machine apart, and cleaning can be done quickly and easily. To clean a clay pasta machine after use, you’ll need the following:
- Baby wipes
- Wooden skewer or toothpicks
- Paper towels
To clean the pasta machine, follow these steps:
- Take a dry paper towel and clean up any crumbs, glitter or other debris you can easily access.
- Turn the dial to the widest setting and flip the machine upside down.
- Using a wooden skewer or toothpick, gently scrape clay buildup from the blade and remove any residue with a wipe.
- Turn the machine right-side up and give it a gentle shake.
- Scrape out any excess clay that may have accumulated between or around the rollers.
- Rotate the rollers using the handle, and clean them with a wipe as you turn them.
- Finally, use a wipe to clean off the outside of the machine from top to bottom.
By keeping your clay pasta machine clean, you’ll prevent colors from mixing, and you’ll help keep your machine in great shape. Always use a baby wipe or paper towel to clean the rollers before switching to a different color, and try to remove any pieces of clay you can reach whenever you can. Lastly, never use a metal tool to scrape clay from the machine, as metal can scratch and damage the rollers.
Tips for Using a Pasta Machine for Polymer Clay
If you recently purchased your first clay pasta machine, you probably can’t wait to get rolling and claying. But, before you open a block of clay, you’ll want to consider some helpful tips. Pasta machines were designed to turn pasta dough into noodles. So, although they are an essential polymer clay tool to many clayers and are generally easy to use, they can also present certain challenges when using them with clay. Here are ways to solve common issues, and other tips and tricks for getting the most out of your pasta machine.
1. Removing Lines
When you use a pasta machine to condition polymer clay, you may notice horizontal lines running across the clay. Horizontal lines commonly form when you use the thickest setting as a result of regular gear action. You may not even notice the lines, and by the time you complete your project, it’s unlikely they’ll be noticeable at all.
However, if the lines are more defined, you may wish to smooth them out. You can clear the lines by placing a plain piece of white paper on top of the clay sheet and gently rubbing the clay with a roller in a back and forth motion. Just make sure to rub, not roll, the clay.
If you notice any vertical lines on your clay that always seem to appear in the same place, there’s probably something scratching the clay. For example, there may be a piece of glitter stuck to a blade or roller, or you could have a chipped blade. To solve this issue, gently pull a baby wipe through the machine to try to remove any debris. If that doesn’t work, you may need to disassemble the machine and remove the nick with sandpaper.
2. Preventing Rippling
Sometimes when you use the thinnest settings on a pasta machine, the clay will undergo a stick-and-release motion, which will cause the final sheet to have multiple folds. When using the thinnest setting, the clay may also stick to both rollers, which can create a wide ripple in the clay.
Rippling may be more common with older machines or any machine with misaligned gears. To prevent any rippling, you’ll want to take good care of your machine right from the start. This will keep the gears aligned and running smoothly. To do so, make sure not to jam large pieces of clay into the machine, clean the machine regularly and always treat the machine gently.
Another option is to use two different machines to keep them in great shape longer — one for conditioning or blending clay and another for passing final sheets through using thin settings.
Rippling can also occur with new machines if you use clay that is too soft and sticky. Therefore, it’s best to use firmer clays with a pasta machine.

If you have clay that seems too soft out of the package, you can still use it with a pasta machine. To make it firmer, you can remove some of the plasticizers. To make too-soft clay more firm and ready for a pasta machine, take these steps:
- Protect your workspace with wax paper or foil.
- Roll the clay into sheets that are about 1/4-inch thick.
- Sandwich each clay layer between two sheets of clean white paper.
- Place a sheet of wax paper or foil over the top sheets of paper.
- Use books as weights and place them on top of the paper and clay “sandwiches.”
The paper sheets will help draw out the plasticizers from the clay. You can change the paper as many times as needed until you reach the desired consistency.
3. Preventing Smudges
As you use your pasta machine, bits of clay will naturally collect on the blades. This can cause streaks of colors on clay sheets, which can be especially noticeable with white clay. To prevent streaks and smudges, clean the machine before each project and stick to using firmer clay. It’s also a good idea to avoid putting clay with inclusions such as glitter through the pasta machine. Instead, you can condition polymer clay with inclusions by hand or use an acrylic roller.
4. General Tips and Tricks
You’re almost ready to put your clay pasta machine to excellent use! To summarize everything we covered, here are top tips to keep in mind:
- Never force lumps of clay through the machine.
- Always keep your pasta machine clean — especially when using different colors.
- Start with the lightest color and work up to the darkest if using multiple colors in a project.
- Don’t use too-soft clay with a pasta machine.
- Never use metal tools to clean the machine.
- Warm clay by first rolling it with your hands a bit to help speed up the conditioning process.
- Do not use a pasta machine to make pasta after you use it for clay conditioning.
Check out the Sculpey Clay Conditioning Machine
Imagine all of the colorful creations you can make with polymer clay, from jewelry pieces to home decor to seasonal ornaments. Whether you’re a beginner or a claying pro, a craft clay conditioning machine will help you produce smooth, pliable sheets of clay to use in just about any project.

With the Sculpey® Clay Conditioning Machine, you can enjoy the benefits of using a conditioning machine designed especially for polymer clay. With a durable, high-quality gearing system, corrosion-resistant stainless steel rollers and nine different thickness settings, the Clay Conditioning Machine makes the rolling process easy and fun, and it produces flat, pliable sheets perfect for your most imaginative projects. To enjoy smooth rolling with a long-lasting machine, purchase the Sculpey® Clay Conditioning Machine today. Still have questions? Please check out our FAQ page, or contact us online and we’ll happily help!
